
When you complete the final stitch of a project, it’s tempting to skip blocking. In all the excitement that comes with the final bind off and weaving in of ends, blocking can seem like a tedious chore. However, it is an essential finishing technique that shouldn’t be overlooked! Don’t let blocking get you down; read on to discover a general overview for blocking your crochet projects.
What it is
Blocking is the introduction of moisture to a crochet or knit project to set or shape the final project. In short, blocking is getting your project wet and letting it dry! There are a few techniques for accomplishing this, including mist blocking, wet blocking, and steam blocking (outlined below).
Supplies


What you'll need to know
Read the care instructions on your label.
A yarn label should offer care instructions that will be very helpful when blocking. This is where you will be warned if a yarn shouldn’t be submerged in water, if it shouldn’t be exposed to heat, etc. Always follow the care instructions on your yarn label, and choose the blocking method accordingly.
Don’t let a hot iron touch your yarn!
A hot iron applied directly to your yarn could melt it. YES! MELT IT! Especially if the yarn contains acrylic. Only use the iron for the steam it produces, and don’t let that hot metal touch precious yarn.
Never wring or twist a project.
If you completely submerge a project in water, don’t wring or twist it to get the water out. Your project is vulnerable to shaping (and misshaping) when it is wet. Wringing or twisting will distort your stitches.
Always block a swatch first.
Test out your blocking method on a small swatch first. This way, if you misread the yarn label, melt your yarn, or twist it out of shape, you’ve only messed up your swatch and not the sweater you’ve spent months making.
Tips and Tricks
- Use enough pins. Using too few pins if you’re trying to stretch your project will result in an undesirable final shape.
- For blocking large projects, use a firm mattress or a carpeted floor (away from pets).
- Wool and cotton yarns often have the best results when blocking. Blocking acrylic yarn might be less noticeable.
- You may need to block again if your project gets wet (like if you wash it, or wear it out in the rain).
- Know your washing instructions. It’s always helpful to know the symbols associated with fabric care. Check out this key from the Cleaning Institute.
Now go forth and block those projects!
The Methods
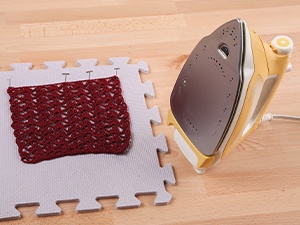
Steam Blocking
What you need
Blocking mat, steamer or iron with steam setting, pins.
How to do it
Lay your project flat on the blocking board, pinning it flat if needed. Hold the iron just above the project (but do NOT let it touch), and let the iron release some steam onto your project. Allow the pins to help the project stretch and/or lay flat, or gently use your hand (just be careful not to burn yourself ).
When to use it
This method is great for projects that just need a light blocking. It can be a very helpful method for acrylic yarns as long as you don’t let the iron touch the acrylic. The acrylic could melt (we call that “killing” your yarn).
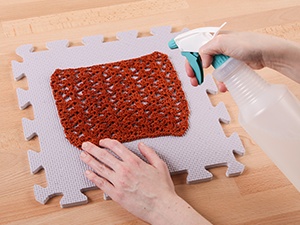
Mist Blocking
What you need
Blocking mat, misting spray bottle, pins.
How to do it
Mist your fabric lightly with water, and lay it flat to dry. If that doesn’t get the job done, pin your project to the desired dimensions, and then mist it and leave it to dry.
When to use it
This is a good “play it safe” method for blocking. It gives the yarn a little moisture without completely submerging it, and it keeps the yarn from being exposed to too much heat.
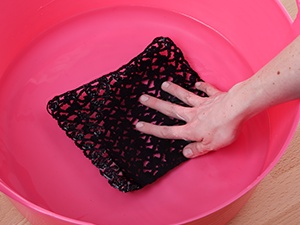
Wet Blocking
What you need
Blocking mat, tub or sink with cold water, towels, pins.
How to do it
Submerge your project into a tub of cool water and let it soak for 20 minutes. Drain the water and gently press out the excess water (do not wring or twist!). Use towels to help blot out the rest of the water. Lay the project flat on blocking boards to dry. Use pins to stretch it into desired dimensions on the blocking board if needed.
When to use it
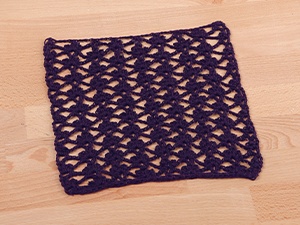
The stitches are easier to stretch when they are this wet, so use this for a project that needs to be stretched or intensely blocked. Try this with cotton or wool projects, especially if they have lace stitch patterns.
The results
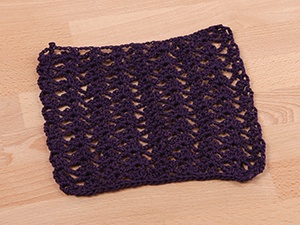
Before
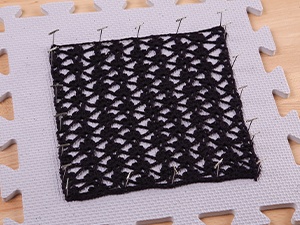
Pinned and Drying